- No products in the cart.


The Ultimate Guide to Dimmer Switch Installation
11
Dec
Installing a dimmer switch in your home offers a multitude of benefits that go beyond simple lighting control. First, it provides flexibility, allowing you to adjust the brightness levels according to your mood or activity, creating a number of different ambiance options for the room. Beyond aesthetics, dimmers can also reduce glare in the room and the eye strain associated with bright lights. Additionally, by dimming lights to lower levels when full brightness isn't necessary, you are also reducing electricity consumption and extending bulb lifespan.
However, before you can begin enjoying the many benefits of controllable lighting, you first have to master the dimmer switch installation process.
In this how-to wall dimmer install guide, we’ll walk you through the entire process, from picking out a dimmer switch to putting on the finishing touches, while providing some invaluable dimmer switch installation tips along the way.
Picking the Best Dimmer Switch for Your Home
Before delving into the installation process, let’s first discuss finding a suitable replacement for your existing light switch. It’s important to remember that not all dimmer switches are universally compatible with every type of lightbulb. That’s why, when it comes to picking the best dimmer switch for your home, it's imperative to consult the manufacturer's specifications to ensure compatibility with incandescent, LED, or CFL bulbs.
It's also crucial to consider whether you’ll need a single-pole or three-pole dimmer switch. If the current light switch is the sole controller of the existing light fixture, a single pole dimmer switch is needed. However, if two existing switches regulate a single light fixture, a three-pole dimmer is essential.
If you’re interested in more advanced dimmer switches with wireless technology, the FREEDiM Series Deco Wall Dimmer is designed to fit standard electrical boxes, and it combines the convenience and flexibility of a remote dimmer with the style and functionality of a traditional hardwired switch – greatly reducing the materials needed and labor costs.
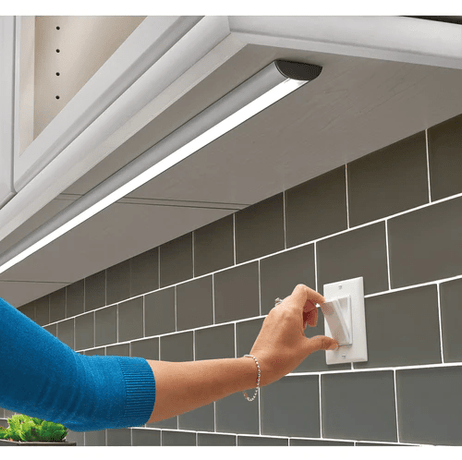
How to Install a Dimmer Switch
Step 1: Gather the Necessary Tools and Materials
- Dimmer switch
- Screwdriver (flathead or Phillips, depending on your switch)
- Wire cutter
- Wire stripper
- Non-contact voltage tester
- Electrical tape
- Wire nuts
- Wire connectors
- Needle-nose pliers
- Pen and paper (for labeling wires)
- Safety goggles
Step 2: Turn Off Power and Test
First, turn the power off – at the breaker, not the switch. Use the voltage tester to double and triple check that there’s no electricity running through the wires. The last thing you want is to stick your hand into a live circuit!
Step 3: Remove the Existing Switch
Unscrew the cover plate and remove the screws holding the old switch in place. Carefully pull out the switch and disconnect the wires attached to it. Take note (or a picture) of the wire connections and where each wire was attached to the switch.
Step 5: Prepare the Wires
Use the wire stripper to remove about ¾ inch of insulation from the wires in the switch box. Once exposed, double-check that there are no damaged wires or loose strands.
Step 6: Connect the Dimmer Switch
Attach the wires from the dimmer switch to the corresponding wires in the switch box. Most dimmer switches come with clear instructions on how to connect the wires. Typically, you'll match the wires by color—black to black, white to white, and green or bare copper to the ground wire. Tighten a wire nut over each pair of wire ends, trimming any exposed wire with the wire cutters.
Step 7: Secure the Dimmer Switch
Carefully tuck the wires into the switch box, ensuring the dimmer switch fits snugly against the wall. Use the provided screws to secure the dimmer switch in place. Be cautious not to over-tighten the screws, as it could damage the switch or wall.
Step 8: Test the Dimmer Switch
Turn the power back on at the breaker panel. Test the dimmer switch once the power is restored to ensure it functions correctly. Adjust the dimmer to various levels to see if the lights respond accordingly. If everything works as expected, proceed to the next step.
Step 9: Secure the Cover Plate
Place the cover plate over the dimmer switch and fasten it with the screws provided. Ensure the plate is aligned correctly and sits flush against the wall.
Step 10: Finishing Touches
Secure the wire connectors using electrical tape to ensure they won't come loose. Tuck any excess wires back into the switch box, making sure they don't interfere with the switch's functionality. Before considering the installation complete, perform one final check:
- Ensure all wire connections are secure and properly insulated.
- Verify that the switch functions smoothly across its dimming range.
- Check for any exposed wires or loose connections.
Installing a dimmer switch can truly elevate your home's ambiance and energy efficiency, and as you can clearly see, with the right tools, a little caution, and a step-by-step approach, this DIY project can be accomplished even by those new to electrical work. Remember, however, if you're uncomfortable or uncertain at any point in the process, don’t hesitate to seek professional help.
If you need lighting ideas for your home or office, Wholesale Home has a huge selection of interior lighting options to browse through–from bathroom vanity lights to living room dimmer switches, we have you covered!